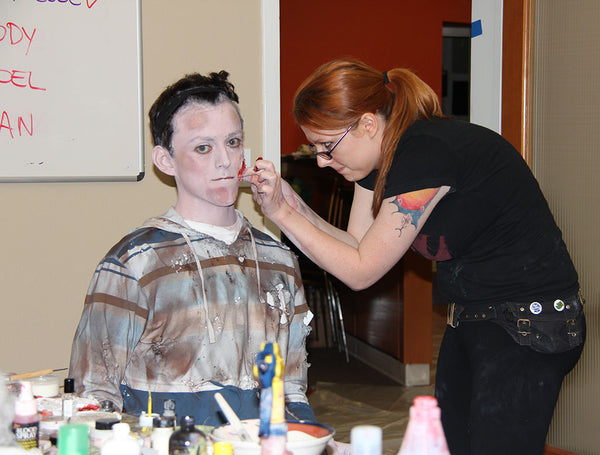
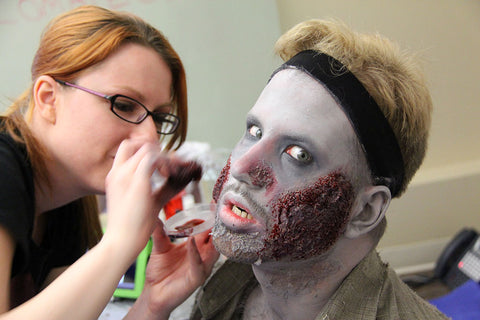
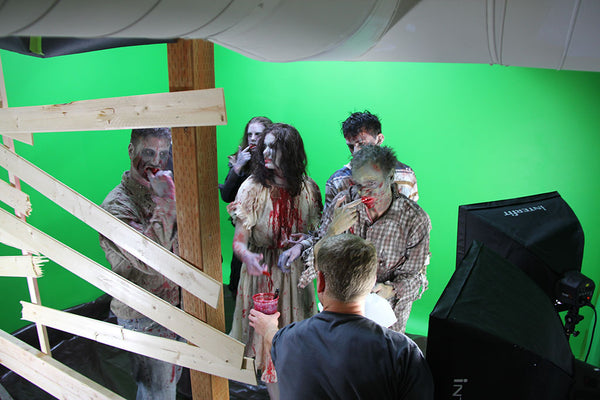
For the live action filming of Zombie Invasion!, we had our very own Emily Diehl take on makeup duties. Emily has had a passionate history studying effects makeup, so we were very excited to utilize her skills. Our latest behind-the-scenes web doc covers the makeup process that our actors had to endure, as well as the skills involved in turning them from normal human beings into a flesh-craving zombie horde.
For all of our fans interested in how makeup is done, I took a little time to pull Emily aside to interview her about her experience creating the zombies for Zombie Invasion!

How long did it take you to create each zombie?
I spent about a half hour to 45 minutes on most of the zombies, and about twenty minutes on my own makeup. (Since I’ve gotten familiar with the look I like on myself, I can knock it out pretty quickly).
The amount of time a makeup takes usually depends on how complex it is. For instance, really gory zombies with a lot of rot and wounds will generally take longer than a simple zombie with dark circles under their eyes and some ashen skin.
This isn’t always the case, though.
For this shoot, I was doing all of the application with my hands, brushes, and makeup sponges, and found that getting blending right was actually pretty difficult on the simple looks – especially when you’re trying to go fast enough to get zombies onto the set as quickly as possible. Blood will cover up just about anything, but when you’re just laying down coats of colors, you need to pay a lot more attention to how everything blends together. Using an airbrush would have cut that time back quite a bit. Luckily, I didn't need to worry about covering large areas like legs and feet for the scenes we shot.
An interesting thing about doing makeup for film, though, is that exaggerated colors and shapes can actually end up looking better than the smoothly blended applications that you’d generally prefer for up-close-and-personal encounters, especially on areas meant to be gaunt, shadowed or otherwise accentuated. Things really do look a lot different on camera.

How long have you been doing makeup?
I’ve been a horror nerd for as long as I can remember (I saw Night of the Living Dead when I was four), but I didn’t start doing actual “serious” makeup stuff until high school. When I was younger, I actually wanted to go to school for FX makeup, but my career took me in another direction.
What are some of your favorite makeup supplies?
Well, I’m a big gore fan, so I really, really love different types of blood. "Fresh Scab" is a really cool, chunky blood that's great for making crusty-looking cuts, and blood powders are fantastic for getting a light splatter effect. Just sprinkle a little bit onto a face, arm, or shirt and hit it with a spritz from a water bottle and voila!

Do you make your own blood or do you buy it?
For mass quantities of blood, I generally make my own because stage blood can get pricey – especially the kinds that you can put in your mouth. I whipped up two different types for the Zombie Invasion! shoot – a pint or so of a thick, dark blood to use for clothes and to supplement my makeup kit’s supply, and several gallons of a slightly thinner “spit blood” to use for, well, spitting.
While my “recipe” tends to vary slightly from batch to batch (I’m the kind of person that cooks by eye), it’s made from various combinations and ratios of corn syrup, red food coloring and chocolate syrup/cocoa powder. For my huge batch of spit blood, I used fruit punch for volume and added extra syrup and corn starch to thicken it. As a general rule of thumb, just mixing food coloring with syrup leads to a weird, oily-looking mix. It’s the chocolate that makes it dark, and the starches and powders that thickens it up and makes it more opaque.
Because of all of the sugar in them, my bloods were ridiculously sweet, which was kind of pleasant for the actors…at first. After a full day of shooting, though, they were all practically in sugar shock. I don’t think any of them will drink red punch again.

What's one of your favorite makeup tricks?
I really love using simple latex prosthetics to achieve complicated looks. If you’re not into sculpting and molding them yourself, you can purchase a variety of different wounds from costume shops (they’re often called “woochies”).
These items can be applied very easily – all you need is the prosthetic and some spirit gum. Wash and dry the area where you’d like to apply the wound, brush a thin layer of spirit gum onto the skin, then use your finger to tap the liquid layer until it becomes tacky. (This is important because it’s going to help the prosthetic stay in place. If the gum is too wet, the wound will fall off or slide around when you touch it.) Once the gum is sticky enough, place the piece on your face and press it down.
For additional sticking power, it’s a good idea to brush the edges with some liquid latex. Since being able to see the edges of prosthetics is a pet peeve of mine, I also roll some thin strips of scar wax between my palms and use additional spirit gum to secure them to the edges of my wounds. Once applied, I use my fingers (or an applicator) to spread the wax out and across the area. This not only obscures edges, but also gives some additional texture to the face. When it comes to makeup, chunky and gross is always a win in my book.

What's the most difficult part of creating a zombie?
For me, the hardest part is knowing when to stop. I’m a huge Italian horror fan, so I have a tendency to go over the top, especially with gore. For many zombies, though, simple is better. Nailing those really basic looks is always tough because it’s easy to want to add “just one more wound” or “just a little more blood”.
Color is also another tricky part, especially when you’re doing makeup for a film. As I mentioned earlier, you’ll find that the colors you blend and apply don’t usually look the same on-screen, which can either be really maddening or really awesome, depending on the makeup. For example, I accidentally added too much green to Ryan’s skin tone, so we were all teasing about him being a “swamp zombie”. When he got on set, though, the colors completely mellowed out and he barely looked green at all.

Who inspires you?
There are a lot of makeup and effects artists out there that I really look up to, but I’d say that guys like Dick Smith and Tom Savini have been the most influential for me. Tom’s work on Dawn of the Deadwas incredible, and Dick was an absolute pioneer in the FX field (If you aren’t sure who he is, he was the guy responsible for Reagan’s makeup in The Exorcist. You can’t beat that.)
Do you have any advice for budding makeup enthusiasts?
There are actually a ton of great resources out there on the internet that will help you learn techniques. Many Halloween and makeup forums have members that are excellent, friendly artists with lots of advice. I’d also recommend tracking down a copy of Dick Smith's Do-It-Yourself Monster Makeup Handbook. This book was a big inspiration for me and many other makeup folks out there.
More than anything, though, I’d say that practice makes perfect. The more makeups you do on yourself and other people, the more you’ll figure out what you need to learn and improve on. Those crash-course lessons are invaluable. When you think about it, the people that pioneered effects used their creativity to achieve really cool results, generally with no training and few resources. You can, too!

